How to plan your content
- Leedr

- Dec 6, 2022
- 3 min read
Content doesn’t just happen.
Sometimes other businesses make creating and posting content look so easy. But in reality a lot of work goes into planning, staging and scheduling content and it all begins with your content calendar.
If you Google ‘content calendar’ you’ll be buried in a mountain of results. Tons of google sheets, pdf’s and everything in between. We know, because we’ve tried nearly all of them over the years. From our experience, we’ve distilled the most important parts, removed the confusing and unnecessary elements to create the most simple, and functional content calendar for you.
1. Why plan content?
Because last minute posts are rarely good. And you want to post good content that your customers love and engage with. So it’s important to plan ahead so you can craft thumb-stopping posts.
A good rule of thumb is to plan a month in advance. Depending on how many posts per week you want to create you can generally do a months’ worth of content in a day. Think about that - one day and you’ve got content for the rest of the month on autopilot - letting you focus on the business, not working about creating content.
2. Planning post types
When you plan content in advance, you can make sure that you’re creating a balance of content and not just spamming your customers with whatever is quick and easy to post.
When you think about it, there’s so many different things that you can create content for about your business. We’ve used a fictional yoga studio as an example on the content planner sheet. In the “Post Types” tab, you can see some example posts categories we’ve created. This gives a great blend of things that can be posted.

3. Layouts
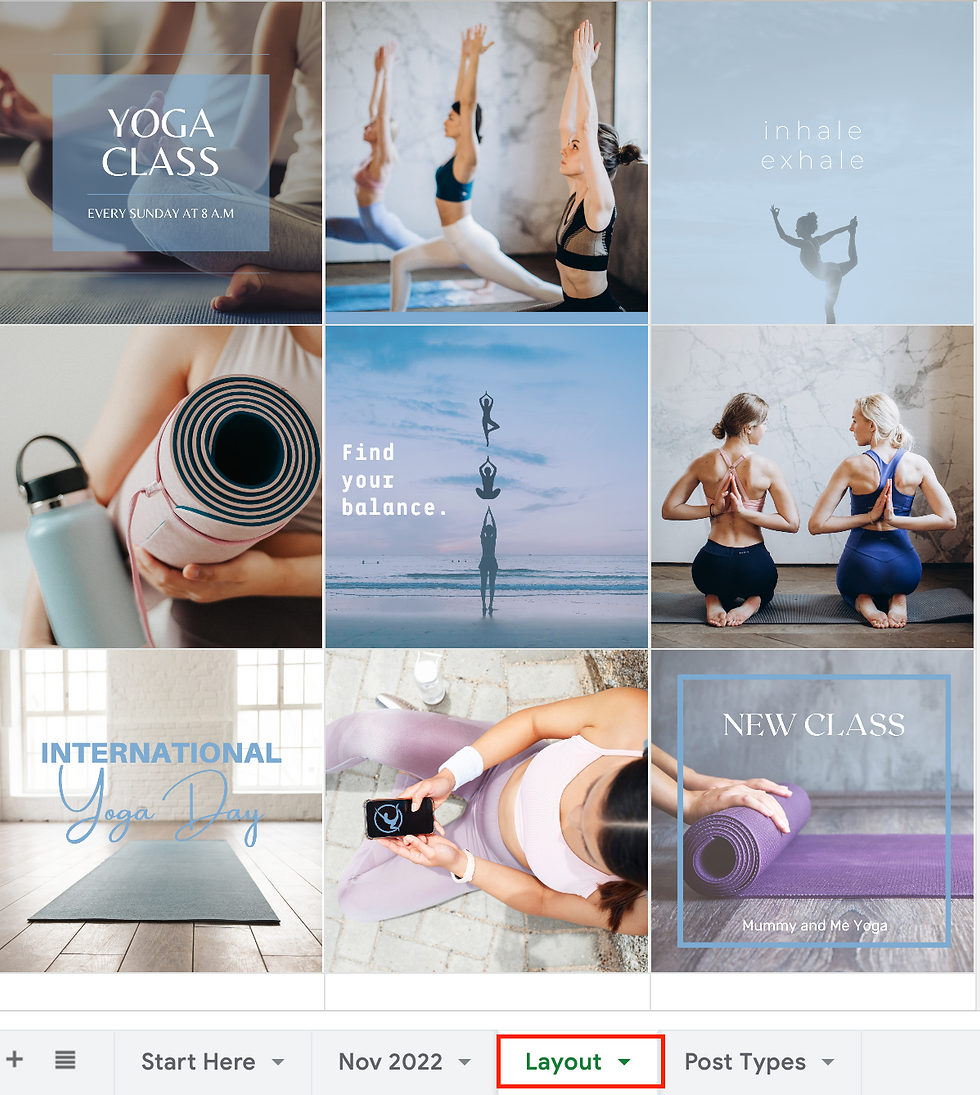
Planning your post types is essential, and so is creating a layout. The layout shows you which images from your posts work well together and how to arrange this media to create a balance in the visual identity of your content.
You can click on the “Layout” tab in the content planner sheet to see an example of the yoga studio we’ve created. Here we’ve balanced photos with images that have a graphic overlay so nothing is bunched up or repetitive.

Once you have the images for your content, you can upload them to this sheet and arrange them until you find a layout that works for your content.
4. Adding posts to the monthly planner tab Ok so just to recap here; you've selected your post types, arranged your images in the layout so the next step is to add your content into the month tab. This is where you'll drop the images onto days of the week and write the copy for them.
The content planner sheet's month tab (currently labeled as "Nov 2022" but you can rename to the month you're working on). In this tab you can see there are rows for each day of the week - and these rows have space for 3 images, post type, Instagram copy, Facebook copy and hashtags.

3 images: for posts that have more than one image.
Post type: this reminds you what the post is about.
Instagram copy & Facebook copy: most times the copy will be the same, but there will be times when it needs to be different, like when you need to add a link or you're tagging someone who has different tags on Facebook and Instagram.
Hashtags: less is more so don't flood the post with hashtags. And make sure they're applicable to the post you're creating.
5. How to use the sheet
The content planner sheet is a Google sheet that will help you to simply and easily plan your content in advance.
Step 1 is to click on the link to open the sheet, then click on File > Make A Copy to create your own copy.

Step 2: click the "Nov 2022" tab on your copy to view the calendar planner for that month. Example posts have been added for the first week. Update the days and month to the next month and keep duplicating this tab for upcoming months as you go.

STEP 3: click the "Layout" tab to plan out the visual layout of your posts.

STEP 4: click the "Post Types" tab to list all of the types of posts you can use.


